
Geowave is a library used to store, index and analyze geospatial data on top of Accumulo which is a free software implementation of Google’s Big Table. Accumulo in turn makes use of Zookeeper to handle distributed synchronization and uses Hadoop FileSystem for distributed and scalable storage of the data. Geowave decomposes multi-dimensional data to single dimensional data using a transformation called as Space Filling Curves. GeoServer is a java based server which provides a platform to view and edit geospatial data. Hence at an abstract level, we can summarize that the data which is transformed by goewave and stored(ingested) in Accumulo can be extracted and viewed from geoserver.
Following article will explain how we can setup the system to have Geowave and Geoserver working with Accumulo for a development environment.
Part 1:
Hence first to get the setup ready, we need to have the Hadoop/ZooKeeper/Accumulo stack ready.
- Step 1:
To install Hadoop, the hadoop documentation page for a Single Cluster for a standalone operation can be followed.Please note here that as per the configuration mentioned in that documentation,
the <Hadoop_API_Socket>=localhost:9000
After following the documentation, you should now have a running Hadoop File System for a standalone operation running.
You can check this by opening on your browser the following link, “http://localhost:50070/”. This should show up the Hadoop web-interface to check the health of various nodes. - Step 2:
To install zookeeper, the Zookeeper Getting Started Guide in its site is good and very well explained.Please note here again that the socket that is configured to work with Zookeeper instance is
<Zookeeper_API_Socket>=localhost:2181 - Step 3:
To install Accumulo, follow the steps given in Accumulo Documentation. Following this should help you get a running installation of Accumulo.
Please note here that during the Initialization Step, you need to note down the values entered.
<Accumulo_Instance_Name>,<Accumulo_Admin_User> and <Accumulo_Admin_Password>. These values will be used in future.
Once Accumulo is successfully started, you can confirm it by opening on your web browser the following link, “http://127.0.0.1:50095/”. This should show up the Accumulo Monitor webpage.
With this, you have foundation ready to configure Geowave.
Part 2:
Once you have Hadoop/ZooKeeper/Accumulo running on your system, you now need to configure Accumulo to work with Geowave and also used the SimpleIngest example added in Geowave to ingest some data into Accumulo which can later be viewed from GeoServer.
- Step 4: Geowave Jar for Accumulo
If you are a user of geowave, you can make use of RPM to install geowave on your system. However if you are a developer, you should install it using the source. You can clone the source code from the Official Git Repo of Geowave from Github. Once you have the source code, you can notice that Geowave project itself is made up of many sub-projects. Each of this sub-projects have their own Maven configuration to build the respective sub-project. In our case, we first need to build geowave-deploy project. To build the sub-project. go to its directory, “geowave/geowave-deploy” in a terminal.
Now run the mvn install command to build the profile required for generating the required Jar file.mvn install -P accumulo-container-singlejarOnce you are completed with the install, you can then copy the jar created under the “target” directory namely, “geowave-deploy-0.8.4-SNAPSHOT-accumulo-singlejar.jar” to lib directory inside Accumulo installation. Note that version number for your installation may be different.
You will have to stop and start the Accumulo process again so that Accumulo can run with the jar in its classpath. - Step 5: Configuring Accumulo to work with Geowave
After this, we need to configure Accumulo to work with Geowave. The steps are given in the documentation and the same has to be followed. Please note that this has to be run from Accumulo’s bin directory as ‘accumulo’ executable is present there.Once this is done, you should have the Accumulo installation working well with Geowave.
- Step 6: Ingesting data using Accumulo
Though you can use commands to ingest data, I ran the java class from Eclipse. Assuming that you have eclipse installed on your system, you need to import the sub-project, “geowave-examples” and “geowave-accumulo”. Once the projects are build in Eclipse, you can now run “SimpleIngest.java” example in “geowave-examples” to ingest data into Accumulo. To run the class, you also need to pass 5 arguments, <Zookeeper_API_Socket> as configured in step 2, <Accumulo_Instance_Name>,<Accumulo_Admin_User> and <Accumulo_Admin_Password> as configured in Step 3 and also a <Geowave_Namespace> which will used as a prefix for the tables created while ingesting into Accumulo. Ingesting may take several minute. You can check the Accumulo Monitor and see the rate of ingesting. Once the class is run successfully, you have successfully used Geowave to ingest geospatial data into Accumulo. You can now try to understand the apis that Geowave provides to do this by analyzing the SimpleIngest example.Please note that in case you are noticing that your accumulo tables are crashing while ingesting, mainly due to OutOfMemoryException, you can choose to decrease the number of Longitude and Latitude ingested in the example. I ran it with Longitude of -5 to +5 incrementing by 1 and Latitude of -1 to 1 incrementing also by 1.
Part 3:
Now that you have Geowave and Accumulo talking to each other, it is time to add the final piece of this puzzle, GeoServer. GeoServer is a web service used to view geospatial data from various datastores. In our case, we will use Accumulo as a datastore to view the data ingested using GeoWave.
- Step 7: Installation of GeoServer
Download the platform independent binary of GeoServer from here. Extract the downloaded zip file. You can run GeoServer using the ‘startup.sh’ script in ‘bin’ directory as mentioned in RUNNING.txt that comes with the binary.
After running the startup.sh script, you can access GeoServer on your browser on the link, “http://localhost:8080/geoserver/web/”. Please note that default username and password for GeoServer is “admin” and “geoserver” respectively. - Step 8: Geowave Jar for GeoServer
To ensure that GeoServer understands the format of the data ingested into Accumulo, it is important that we also add a GeoWave Jar into GeoServer which will be used to connect to Accumulo and access the data. This ensures that GeoServer doesnt need to worry about understanding how data was ingested, just have to provide hooks to call necessary methods from Geowave Jar. This jar is again provided by the “geowave-deploy” sub-project. Hence, go to geowave-deploy directory inside the geowave source code and run the following maven command to build the profile required for generating the required Jar file.
mvn install -P geotools-container-singlejarWhen the install command is completed successfully, you can copy the jar created under the “target” directory namely, “geowave-deploy-0.8.4-SNAPSHOT-geoserver-singlejar.jar” to the directory “webapps/geoserver/WEB-INF/lib” inside GeoServer installation. Note that version number for your installation may be different.
You will have to stop the GeoServer process and start it again so that GeoServer can run with the jar in its classpath.To check this, you can login to GeoServer and select “Stores” in the left panel and select “Add new store” You should now see under Vector Data Sources, an option to add “Geowave Datastore”. This means that Geowave is successfully integrated with GeoServer
- Step 9: Accessing the ingested data from GeoServer
Now to access the data ingested in Step 6 to Accumulo from GeoServer, we first need to add a Geowave Datastore. So login to GeoServer and select “Stores” in the left panel and select “Add new store”. Now select “Geowave Datastore” under Vector Data Sources.
You need to give a “Data Source Name” which will be used to identify the data store. This can be any name you want to give to the datastore.
You also need to enter “ZookeeperServers” list which in this case is the <Zookeeper_API_Socket> that we used in Step 2.
You also need to need to give Accumulo “InstanceName”, “UserName” and “PassWord” which is what you configured in Step 3 as <Accumulo_Instance_Name>,<Accumulo_Admin_User> and <Accumulo_Admin_Password>. and also <Geowave_Namespace> which we mentioned in Step 6 while ingesting the data.
Once you save, you will get an option to create a new layer from the Datastore. You can select “Publish” action for the GridPoint layername. This will take you to page to Edit the layer. Most of the fields would be auto-filled. Under the Bounding Boxes option, Click “Compute from data” option to let GeoServer autofill the data by directly looking into the data that was ingested. Similarly select “Compute from native bounds” to allow again geoserver to calculate the values for Lat/Lon Bounding box using the data already calculated. Now you can save the layer.
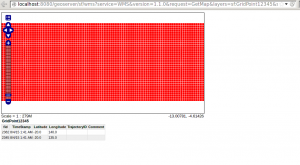
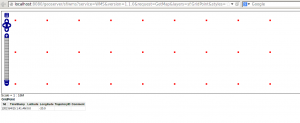
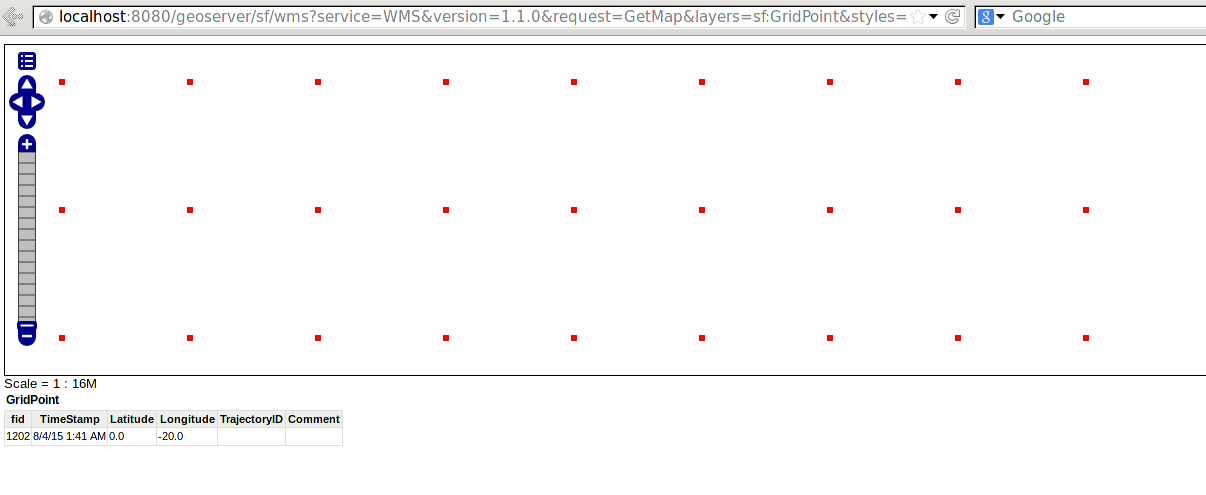
To view the layer which was added, Select “Layer Preview” on the left panel. Now for the layer that you added, select “OpenLayers” option under “Common Formats” column. This should open up a map with lots of Red Points over it looking something as shown below.

Congratulations, you have successfully configured the system to have Geowave and Geoserver working with Accumulo for a development environment. You can now try to ingest custom data using GeoWave and also try to visualize it using GeoServer.